

Ceramic Coating Mistakes to Avoid
Avoid coating mistakes with product-specific preparation, leveling, curing and care. Distinguish high spots, water marks and reduced beading.
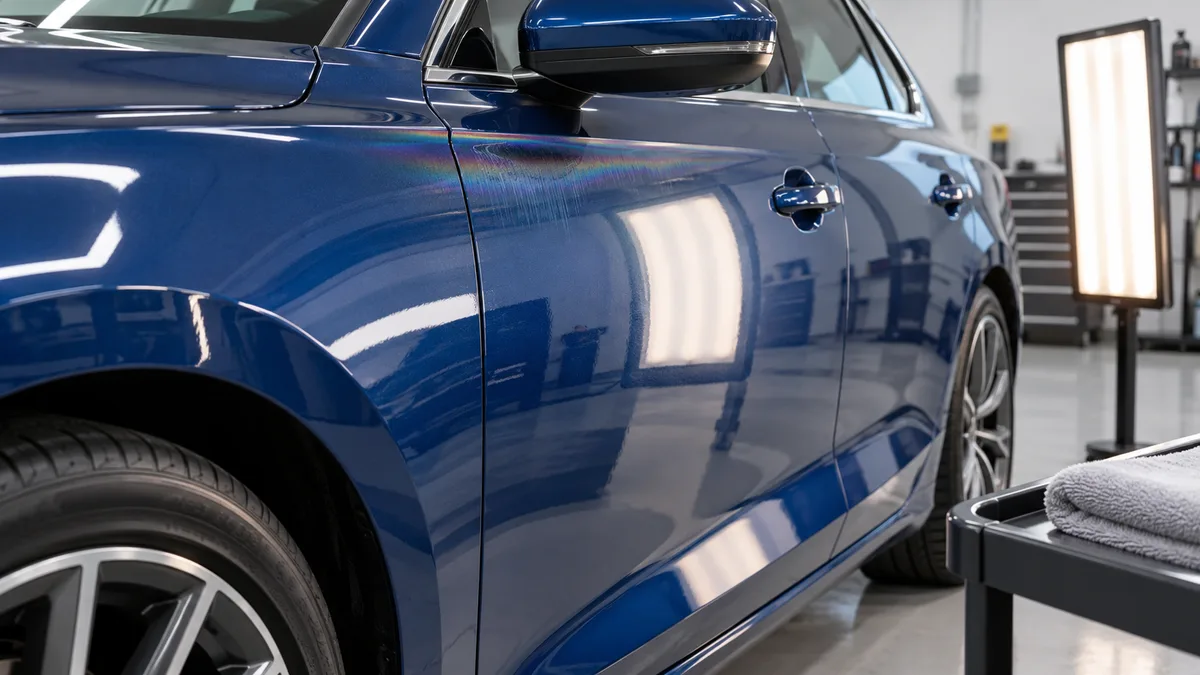
Ceramic coating high spots are areas of excess coating left uneven during application. If you catch residue while applying the product, follow that exact coating's leveling instructions immediately. If a mark remains after installation, identify the coating and ask the installer or manufacturer for a correction plan before adding chemicals or polishing.
There is no universal window in which every coating can be wiped off or reactivated. Our comparison of five published instruction sources below found different wipe-off directions even between two products from the same brand and between two versions of CQUARTZ Lite.
Inspect the panel under suitable lighting and record when the mark first appeared. A streak or uneven patch near an application boundary can suggest leftover product, but a photograph alone cannot reliably distinguish every coating defect, mineral deposit or underlying paint defect.
FEYNLAB's Leveling Aid guidance describes raised streaks, ridges and uneven patches that reflect light differently. It specifically calls attention to edges, emblems and panel gaps. Use those as inspection locations, not as proof that every mark there is a high spot.
Before trying a remedy, establish:
For marks that appeared after water dried, start with the water-spots guide. For changed water behavior without a visible residue patch, use the not-beading guide. These are separate troubleshooting tasks.
On October 18, 2026, we compared five primary instruction sources selected to answer two questions: when does each named product call for residue removal, and does the source describe a later high-spot remedy? The sample includes manufacturer pages and manuals, plus Sky's the Limit Car Care's US product directions for Lite 2.0. It is a documentation comparison, not a hands-on test or a representative survey of coatings.
| Product and source | Published residue-removal direction | What the distinction means |
|---|---|---|
| GYEON Q² ONE EVO | Immediate wipe-off, described as within 10–30 seconds of application. | Do not borrow a longer working time from a different GYEON coating. |
| GYEON Q² PURE EVO | Immediate wiping in hot, humid conditions; within 10 minutes in mild, cool conditions. | The upper limit is conditional, not a target wait in every climate. |
| Gtechniq Crystal Serum Light, Australian application sheet | Residue removal after approximately 10–15 seconds, followed by inspection with bright, diffused light. | The sheet separately directs polishing and reapplication when excess residue has fully cured. |
| Original CARPRO CQUARTZ Lite manual | Immediate excess removal and inspection under an appropriate light. | The older manual allows adding the same Lite product and immediately wiping missed high spots for an unspecified period afterward. |
| CQUARTZ Lite 2.0 US directions | Remove all residue within 5–30 minutes; keep it to 5 minutes in sun or high heat. | Version identification matters. These are not the older Lite manual's immediate wipe-off directions. |
The useful finding is the mismatch, not a winner. A video or saved manual headed “Lite” may describe a different version from the bottle in your hand. The original manual does not quantify its later correction period, so it cannot support a blanket claim that reapplication will fix a high spot the next day. Nor should its remedy be transferred to Lite 2.0 without applicable guidance.
The Australian CSL sheet is a regional document hosted in a 2024 upload directory; the original Lite manual is an older document linked from CARPRO's current manuals page. Check the instructions supplied with your actual product and ask the supplier about conflicts. These excerpts are not complete application or safety instructions.
Pause work on the next section and inspect the area you just coated. Follow the named product's wipe-off method, using the specified clean towels and lighting. Do not increase pressure simply because residue is becoming harder to remove.
Gtechniq's CSL sheet warns against excessive force during residue removal and explains why cloth rotation matters: coating curing in the cloth can make buffing difficult. That supports preparing enough suitable towels before starting rather than trying to finish the car with one saturated cloth.
Distinguish normal flashing from a missed final wipe. The Lite 2.0 US page describes rainbow colors during flashing; color alone, while that product is being applied, does not establish that you have left a cured defect. Use the product's timing and final inspection instructions together.
Leveling time is also separate from the dry-storage and first-wash periods. See the curing-time comparison for those later milestones. Waiting longer before washing does not replace removing excess product during application.
Stop experimenting and obtain a product-specific assessment. In the CSL example, Gtechniq calls for polishing the affected area and reapplying CSL. That is a correction and renewed-protection job, rather than a routine maintenance wash.
Ask whoever performs the correction to explain which area needs work, which protection will be renewed and what curing instructions restart afterward. Do not assume the whole vehicle needs stripping, or that removing a visible mark leaves the existing protection unchanged. The scope requires inspection.
This guide does not provide a polishing recipe for matte paint, wraps, PPF, glass or trim. If your affected surface is not conventional gloss paint, obtain instructions for that material. Our matte-paint guide explains why gloss-oriented correction is an unsuitable default there.
FEYNLAB advertises its Leveling Aid for professional correction of fresh high spots up to 24 hours after installation. It also requires testing on other brands of coating. That is a specific product claim with conditions, not a 24-hour repair window for all coatings or an instruction to buy a solvent and improvise.
Send the installer dated photographs, the affected panel locations and the history collected above before changing the surface. Ask it to confirm whether the mark is application residue, contamination or a paint defect, and to propose the remedy in writing.
Keep workmanship responsibility separate from a manufacturer's product warranty. Ask whether inspection, correction and any reapplication are covered, who will do the work and whether another shop may intervene. The warranty guide helps you check the applicable terms without assuming coverage.
If the original installer is unavailable, compare coating shops and ask specifically about assessing application defects. For future bookings, the DIY versus professional comparison helps define who takes responsibility for preparation, application and correction.
Do not plan on that. Gtechniq's CSL instructions prescribe correction for fully cured excess residue. Document an installed mark and seek advice rather than waiting for a wash to solve an application defect.
Only when the instructions for your exact product and its condition permit that method. The older CQUARTZ Lite manual includes a limited, unquantified opportunity; it does not establish a remedy for every coating, version or elapsed time.
A mineral-removal product is not a diagnosis of excess coating. Identify the mark first, then check both the cleaner's compatibility and the coating's curing restrictions. Use the separate water-spots guide when the evidence points to dried-water deposits.
Avoid coating mistakes with product-specific preparation, leveling, curing and care. Distinguish high spots, water marks and reduced beading.

Ceramic coating curing time varies by product. Compare manufacturer rules for water exposure and the first wash, and plan pickup and rain protection.
Compare DIY and professional coating by product, preparation, workspace, costs and warranty. Use sourced examples to choose the work you take on.
Get the latest updates on ceramic coating technology, tips, and exclusive offers delivered to your inbox.